One of the best things about writing up old cars is hearing the occasional follow-up story – the for-sale listing for this Alfa Romeo Alfetta GT is only a small part of the car’s life, so it’s inspiring to hear the stories about what the new owner decides to do with the car (well, inspiring if it goes well for the car & owner!). It’s even better when the new owner writes up the story so everyone else can share in the joy – here it is, in reader Larry L.’s own words:
The car was located in Astoria about two hours from my home in Portland so I decided it was best to trailer it. Very good idea, turns out it was running terribly rich, someone had fooled around with the Spica injection system and had made a complete bodge job of it. They had actually somehow damaged three of the injectors beyond repair. Well four rebuilt injectors and some professional tuning at Nasko’s Imports and it runs quit well. (Nasko’s is a great place for Alfa’s BMW & MINI, Nasko drives a BMW 318ti with a M3 swap!)
Next up was to add lowering springs for the rear as well as all the bushings, CV boots, a new brake caliper, pads, rotors and exhaust hangers. Following that I adjusted the front torsion bars to lower the front end. I dropped it nearly three inches, so far so good but it scrapes in my driveway a little so I may raise it a bit. While I had the front end apart I changed the steering boots, tie rod ends, upper & lower ball joints, swaybar bushings and caster bushings. Time for an alignment.
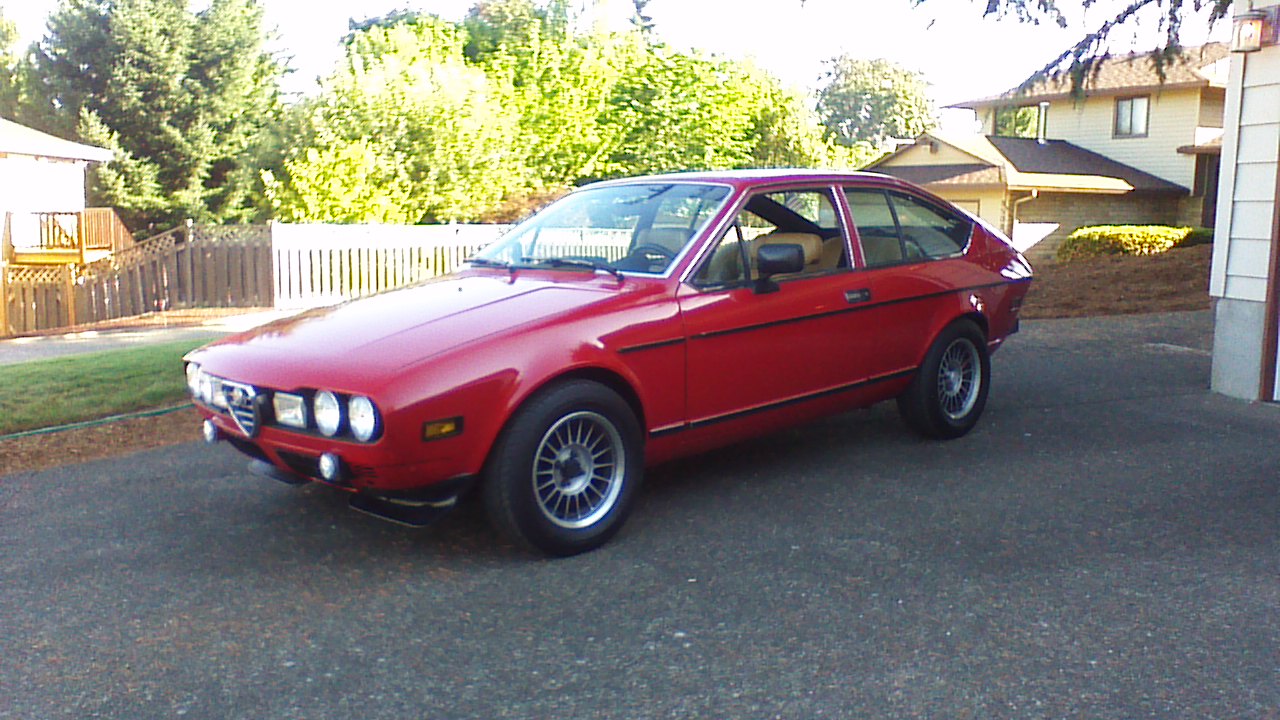
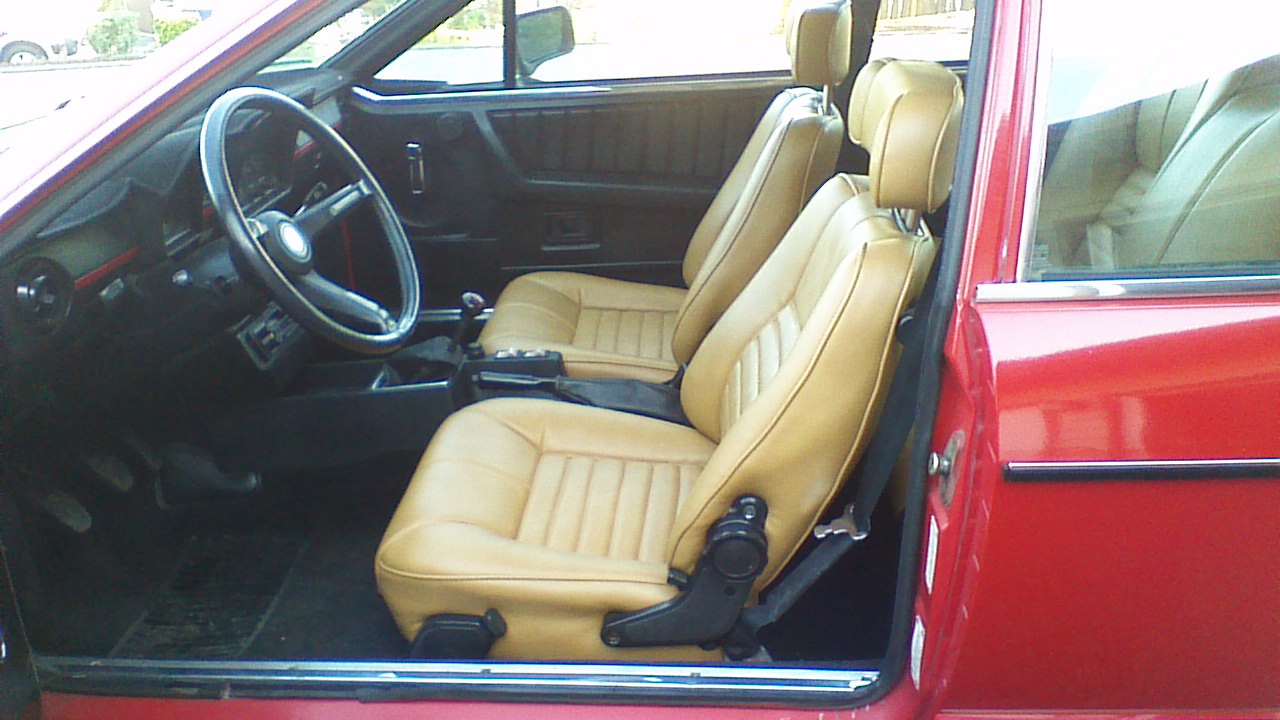
While all of this was going on the seat were being recovered and I cleaned the carpets. The paint needed some attention as well. Surprisingly there was very little rust, a couple of spots on the rear hatch and two areas on the windshield surround. No holes just some surface bubbling and pits, these were fairly easy to repair and I had a rattle can of matching paint made up and used less then half of it to fog in the repaired areas. I painted the hatch and tail light panel satin black just because I like the look of it. Also did a fiberglass repair on the front spoiler.
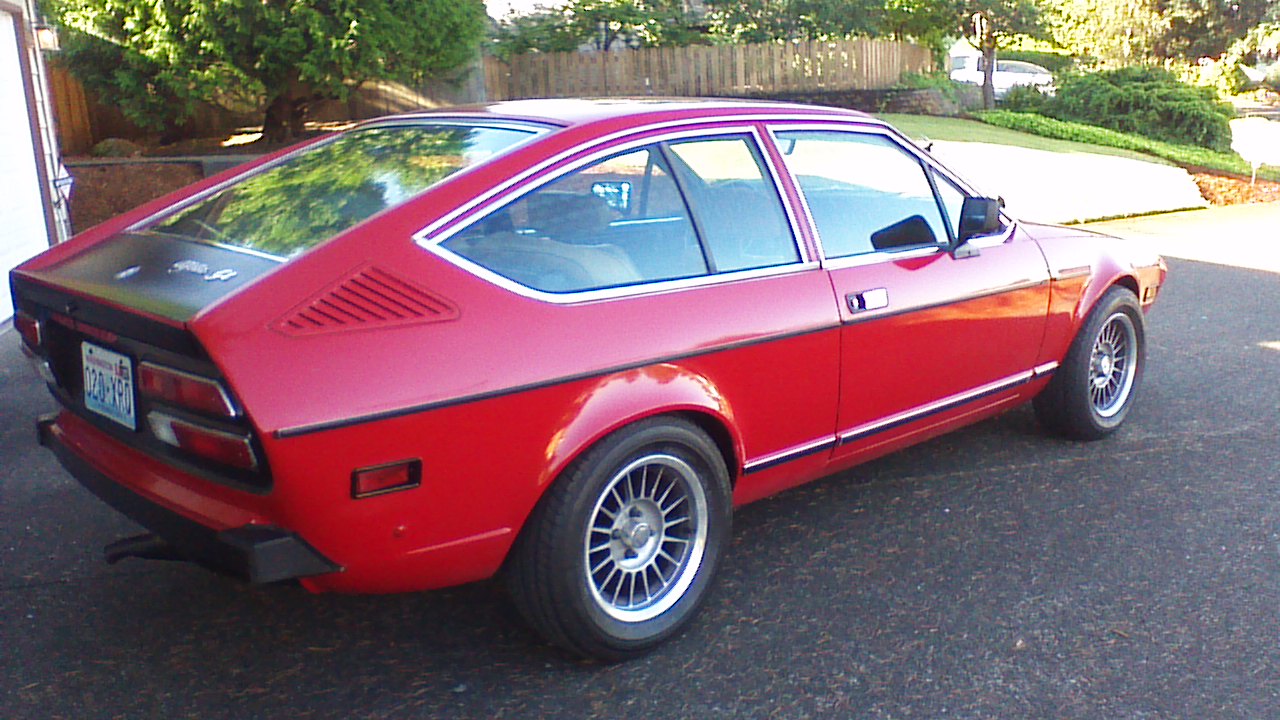
The most noticeable change was removing the bumpers, both of them were split and rusting internally so I had them off trying to repair them. While they were off a few of my “car guy” friends talked me into leaving them off. It really changes the whole look and drops nearly ninety pounds of ugly off the car.
Oh yeah, I forgot the transaxle was completely rebuilt and new clutch was installed. All of the wiring gremlins were chased from the system and new LED turn signals were added to the front. Also cut and buffed the paint…it came out OK, not perfect but about what you’d expect from a backyard repair. I’m sure there are more things to do but I have to have it ready by July 23rd for the Monte Shelton Northwest Classic Rally, put on by the Alfa Romeo Owners of Oregon (AROO).
Thanks for sharing, Larry – the car looks great. Good luck on the Northwest Classic!
If you have a story or pictures to share of a car you rescued, even if you’d like help writing it, click on the Contact link in the right rail and we’ll get it out there.
Tags: alfa romeo, alfetta gt, coupe, epilogue, italian

July 7, 2015 at 11:35 am |
Beautiful car !! And the sound of an Alfa engine … woaw.
July 7, 2015 at 3:48 pm |
very nice
February 22, 2017 at 8:20 pm |
Anybody know what wheels are on this car? I’m looking for a full set for mine.
March 27, 2018 at 2:48 pm |
Those a 100+ wheels made in the U.K. 14 inch 4 x 98 bolt pattern 12mm offset. I have a set off my 1976 Alfetta GT. I may be selling…..
April 17, 2018 at 11:46 pm |
Am curious what the owner used for a rear bumper? If someone knows, please post. thanks.
April 18, 2018 at 11:32 am |
If you click on the pic to view full-size, it looks like he left the rubber shields that cover the area on which the bumper bolts to the body, and then added some kind of blanking panel in the middle – maybe a bit of black plastic/rubber cut to fit?
April 18, 2018 at 11:40 am
Makes sense except to my knowledge there are no rubber shields on the bumper mounts, so that is the piece I was most interested in. Am I wrong?
April 18, 2018 at 11:47 am
My car (a ’79) has them. They’re riveted to the body and cover the square bumper mount protruding at both corners – I’ve converted to Euro bumpers but kept the shields installed. Maybe yours went missing over the years?
April 18, 2018 at 12:08 pm
Thanks Chris – sounds like you are right. I do not yet have the car in my possession, but every photo I have found does not show them. If this is the case, that is great news as fabbing something like this for the rear to make it look decent shoudl be easy.
Have you removed yours? On the front, I was thinking of installing either turn signals, some driving lights or maybe some rubber jack pads or similar. Just need to make it look somewhat finished. The car looks so much better in general and loses over 10 lbs by deleting them. thanks for your help!
April 18, 2018 at 12:23 pm
I kept the covers and did the Euro bumper conversion – got lucky and found them cheap several years ago. There’s no obvious place to relocate the front US turn signals, so turn signals might be the best use of the bumper mounts. The other thing that made a big difference for looks and handling was rebuilding the suspension and lowering the nose a bit (pic is on my write-up of the car, linked on the right side of the homepage). Good luck with the new car!